Employees
Purpose
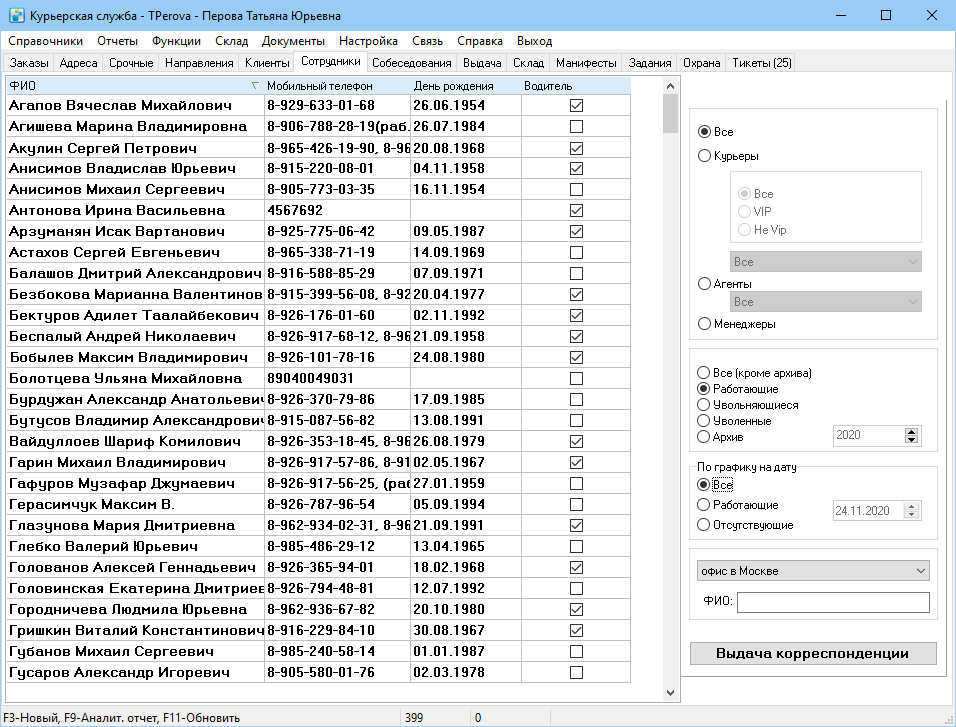
The tab is intended for managing the employee data of the company.
In the right part of the window there is a filter of the list of employees, as well as the button Shipment issue, which you can use to move to the tab Issue and start the issue to the courier allocated in the list of employees.
Employee Types
In the system there is a division of employees by type of activity:
- courier — an employee of the company engaged in the delivery of shipments;
- agent — sales specialist;
- manager — an employee who supervises couriers;
- office — administrative personnel of the company, such as call center operators.
The type of activity is indicated in the employee card.
Employee Card Creation
To create an employee card:
- In the Employees tab press F3 or choose the New context menu item. The Employee Information window opens.
- Fill in the card tabs and click OK. After you save the information, you will have access to the Schedule and Clients tabs.
Employee Card
The employee card appearance may vary depending on the setting of user rights.
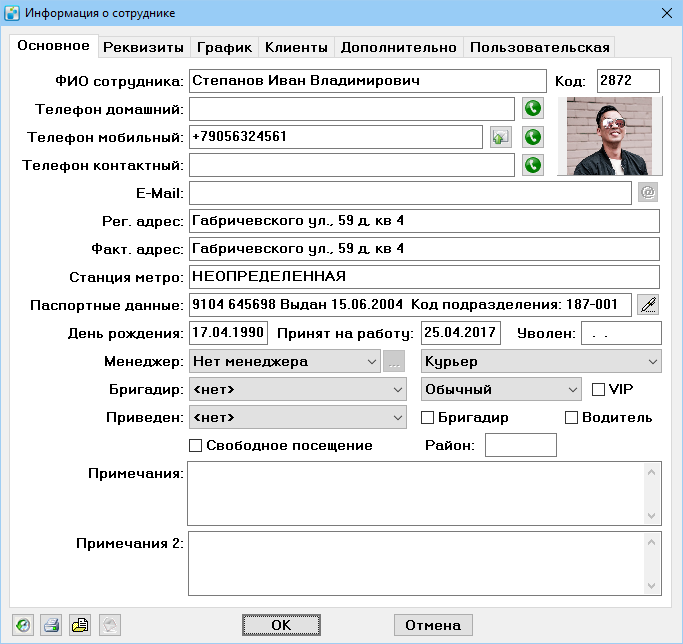
The card contains the following tabs:
- Main
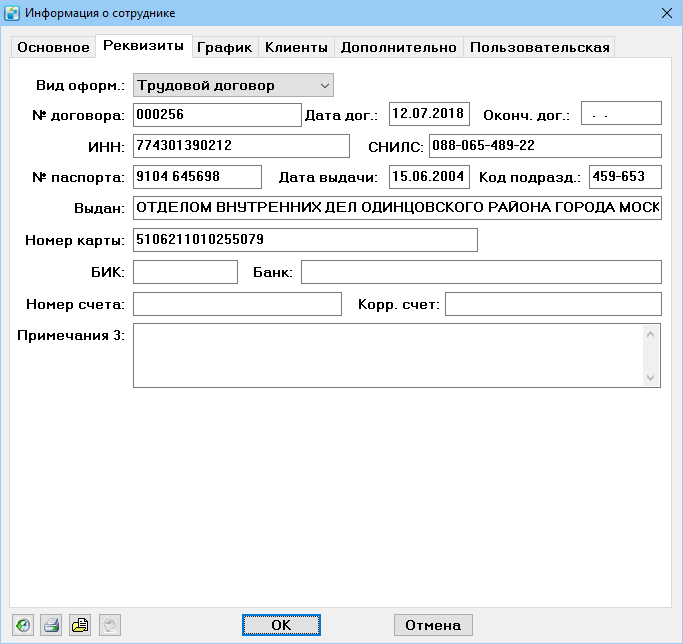
- Company Info
- Schedule
- Clients
- Other
- Custom — for additional functions. More information about the features of the tab is described in the article «Custom Fields».
Main
The tab contains the main employee data. Only the fields that are required are described below.
Code. A numeric value, assigned automatically.
Home Phone. By clicking on the button ![]() you can call via the system.
you can call via the system.
Mobile Phone. By clicking on the button ![]() you can call via the system or using the button
you can call via the system or using the button ![]() send a text message.
send a text message.
Contact Phone. Specify the priority phone number. When you press the button ![]() you can call via the system.
you can call via the system.
E-Mail. The employee's email address. When you click the button ![]() you can send an email.
you can send an email.
Photo" You can add a photo of an employee:
- using a web-camera. Left-click on the photo area. To take a photo of an employee, click Capture. If the photo succeeds, press OK, if not, press Capture again.
- from the computer. To upload a photo of an employee, call the context menu on the photo area, select Upload and select the file on your computer.
You can also use the context menu to delete, save and print a photo.
Subway station. The closest subway station to the place of actual residence.
Passport Info. Series and number, who issued it, date, subdivision code. On the button ![]() you can fill this field with data from the Company Info tab.
you can fill this field with data from the Company Info tab.
TIN. Uniqueness of TIN is controlled inside the system. The field can be used for user synchronization of employees, for example with 1C. Can have different names in different countries.
Manager. Select from the drop-down list the logistician who regulates the courier's work.
Group leader. A drop-down list that includes employees marked with the Group leader checkbox. When you select a group leader, the courier is assigned to them.
Recommended by. Select from the drop-down list the employee who recommended the employee to join the organization.
Drop-down list Employee type.
Restriction on issued shipment. More at «Employee status».
VIP. If the box is checked, the employee becomes a priority when selecting a courier for delivery from the Urgent tab. Also the checkbox is used to filter the list of employees.
Group leader. If the checkbox is selected, the employee performs additional duties, for example, to bring changes in the work regulations to the couriers. Couriers can be assigned to a specific group leader from the list.
Driver. If the checkbox is selected, the employee is considered a driver. Enter the driver's license number and attach the vehicle on theAdditional tab. Specifying a vehicle will allow you to correctly count the courier load.If the checkbox is not selected, the courier is considered a walking courier. To limit the load of the walking courier, specify the maximum weight of the orders issued to him in the variable Maximum weight for courier
Flexible attendance. If the checkbox is selected, the employee can work without a schedule; the schedule is created automatically when the employee comes to work. If the checkbox is not selected, the employee will not be able to start work without a schedule for that day.
Area. Enter the number or name of the area in which the employee works.
Notes and Notes-2. Free fields in which you can specify information related to a particular employee. The "Note-2" can be displayed for employees with additional user rights.
Details
The tab is intended for storing personal data and bank details of the employee.Schedule
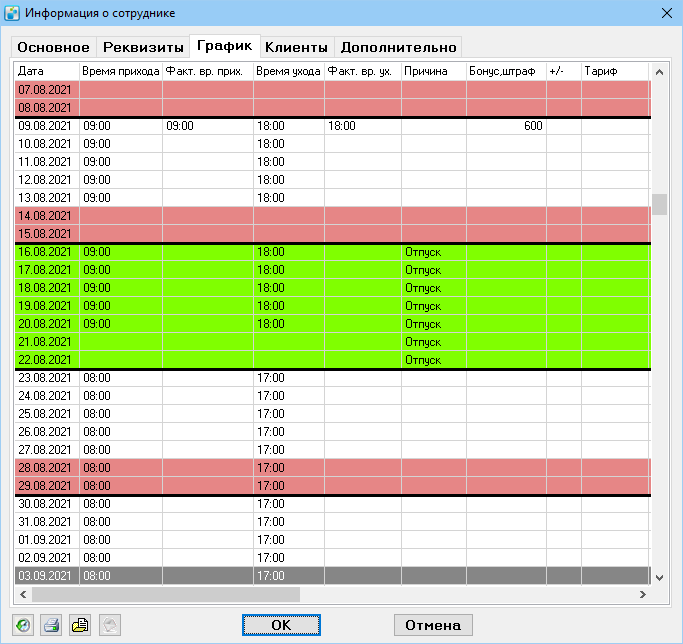
The work schedule defines the working hours of the employees. The schedule contains the reference period of work, working days and weekends, the beginning and end of the working day.
Предусмотрены следующие варианты работы для сотрудников организации:
- по стандартному графику, с временем прихода и ухода;
- свободное посещение. Приход и уход сотрудника фиксируется по факту.
Если у сотрудника нет графика работы и не установлен флажок Свободное посещение на вкладке Основное, ему невозможно выдать отправления.
Для доступа и редактирования необходимо наличие прав.
По умолчанию рабочий день начинается в 9:00 и заканчивается в 18:00, а рабочая неделя длится с понедельника по пятницу. Красным цветом выделяются выходные дни.
В контекстном меню вкладки доступны следующие действия:
- Отпустить — указать причину отсутствия сотрудника;
- Выходной всем — проставить выходной всем сотрудникам;
- Удалить вперед — удалить график на все даты, следующие за выбранной;
- Продлить выделение — скопировать расписание работы выделенного дня до конца графика;
- Продлить график — создать расписание для нового периода.
Подробнее о работе с графиком см. раздел «График работы сотрудников».
Clients
The tab displays the partners that the employee supervises or were brought in by the said employee. The percentage of the client's orders specified in the Manager's % column is added to the employee's salary.
A double click on the line opens the client's card.
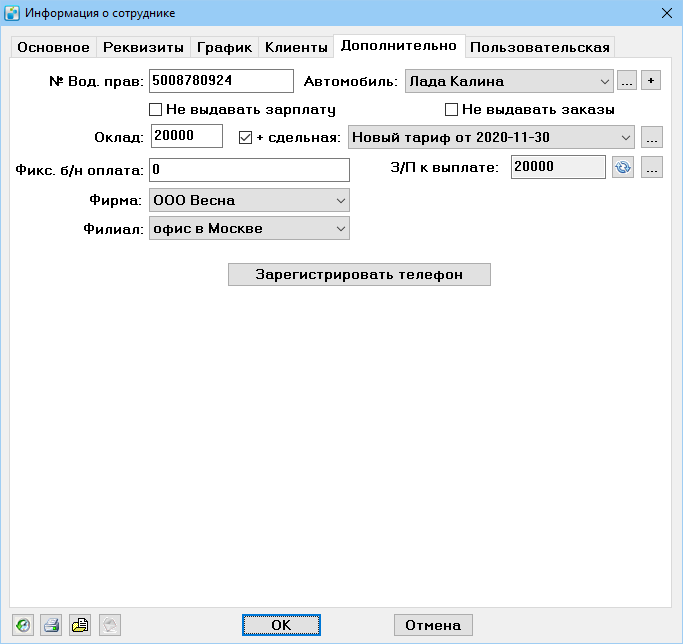
Дополнительно
На вкладке содержится дополнительная информация о сотруднике. Вкладка выглядит следующим образом:
№ Вод. прав. Номер водительского удостоверения. Поле активно, если на вкладке Основное установлен флажок Водитель.
Автомобиль. Модель автомобиля курьера. Выберите значение из выпадающего списка. Поле активно, если на вкладке Основное установлен флажок Водитель.
Чтобы внести новое значение в список, справа от поля нажмите на кнопку ![]() . Откроется окно «Автомобиль». Заполните поля и нажмите на кнопку ОК. Идентификационный номер трекера используется для трекинга сотрудников.
. Откроется окно «Автомобиль». Заполните поля и нажмите на кнопку ОК. Идентификационный номер трекера используется для трекинга сотрудников.
Чтобы просмотреть информацию о выбранном автомобиле, справа от поля нажмите на кнопку ![]() .
.
Не выдавать зарплату. Если флажок установлен, сотруднику невозможно выдать зарплату. Применяется при необходимости административных мер воздействия на сотрудника.
Не выдавать заказы. Если флажок установлен, сотруднику невозможно выдать заказы. Применяется при необходимости административных мер воздействия на сотрудника.
Оклад. Размер денежной выплаты (оклад, должностной оклад) в составе заработной платы, который выплачивается работнику за выполнение нормы труда.
+сдельная. Если флажок установлен, заработок сотрудника зависит от выполненного объёма работ с учётом их качества, сложности и условий труда. Выберите из выпадающего списка настроенный зарплатный тариф. Чтобы настроить начисление сдельной оплаты труда, рядом с полем нажмите на кнопку ![]() . Подробнее см. раздел «Зарплата».
. Подробнее см. раздел «Зарплата».
З/П к выплате. Отображает зарплату сотрудника за текущий период. Чтобы рассчитать текущую сумму зарплаты, нажмите на кнопку ![]() . Чтобы посмотреть детализацию расчета, нажмите на кнопку
. Чтобы посмотреть детализацию расчета, нажмите на кнопку ![]() .
.
Фикс. б/н оплата. Фиксированная часть заработной платы сотрудника, автоматически выплачиваемая безналично каждый месяц. Эта сумма при расчете зарплаты учитывается в безналичных выплатах.
Фирма. Название организации, к которой относится сотрудник.
Филиал. Структурное подразделение организации, где работает сотрудник.
Зарегистрировать телефон. Кнопка предназначена для вывода QR-кода. Курьер сканирует код смартфоном, чтобы зарегистрироваться в мобильном приложении на Android или на IOS.
Employee ID card
Employee ID is used to automatically mark the working time on the Security tab or to identify the courier in transactions with shipments: issue, acceptance of work, acceptance of money.
For the convenience of human resources employees there is a setting When scanning the ID, which allows you to open a payroll instead of the "Issuance" tab when scanning an ID.
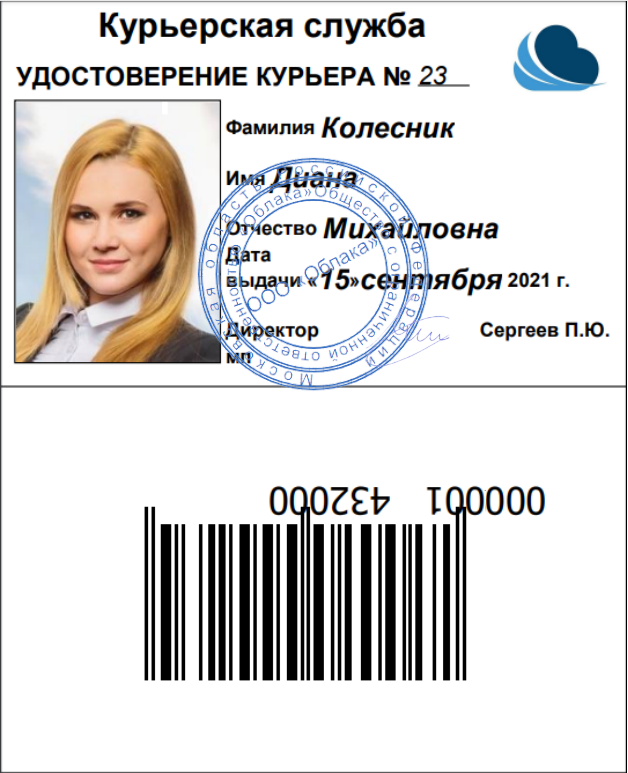
To print an ID, in the employee card in the lower left corner, click on ![]() and select a document. By default, the form is called "ID" and looks like this:
and select a document. By default, the form is called "ID" and looks like this:
You can create your own ID form and upload a text file to References > Print Forms > Courier Documents.
The courier service data is taken from the references Binary data.
Firing an employee
When the exact date of the employee contract termination is known, enter a value in the Terminated field in the employee card.
As soon as the terminationl date arrives, the employee cannot be assigned shipments and will be displayed as fired.
Employee Card Removal
You cannot delete an employee record.
If an employee card was created by mistake, you can edit it: for example, change the data when hiring a new employee.
If an employee has made several deliveries and then quit, MeaSoft stores information on their deliveries and can include them in reports.
Settlements with couriers
To see settlements with a specific employee, select the employee card and choose Payroll from the context menu. The Payroll window opens. For more information, see «Wage accrual».
Reports
You can create reports by employees.
Settings
User rights
Setting access rights for employees of the organization allows you to regulate the viewing, changing and deleting information.
To change access rights, select the Setup > Users main menu option.
We recommend creating user groups to manage access rights, for example, create a group "Managers" to control the access of all logisticians in the organization.
For more information about creating user entries, see «Users».
There are the following access rights for employees:
- To couriers .
- To managers.
- To agents.
- To schedules.
- To bonuses and penalties.
- To additional information.
Employee statuses
The setting allows you to set limits on the shipments to be issued to the employee. In this way you can set limits on the amount of money that can be used to pay for shipments.
By default, there are 3 employee statuses:
- 1 — there are no restrictions on shipments to be issued;
- 2 — the amount up to which cash tasks can be given to the courier is specified. If the additional information does not specify the amount of restriction, the employee cannot be given a money order;
- 3 — the issue of cash tasks is prohibited.
To change, add or delete an employee status, go to References > Statuses > Employee Types and select the necessary item in the context menu.
In the Employees tab, the employees with the selected status colors will be highlighted.
